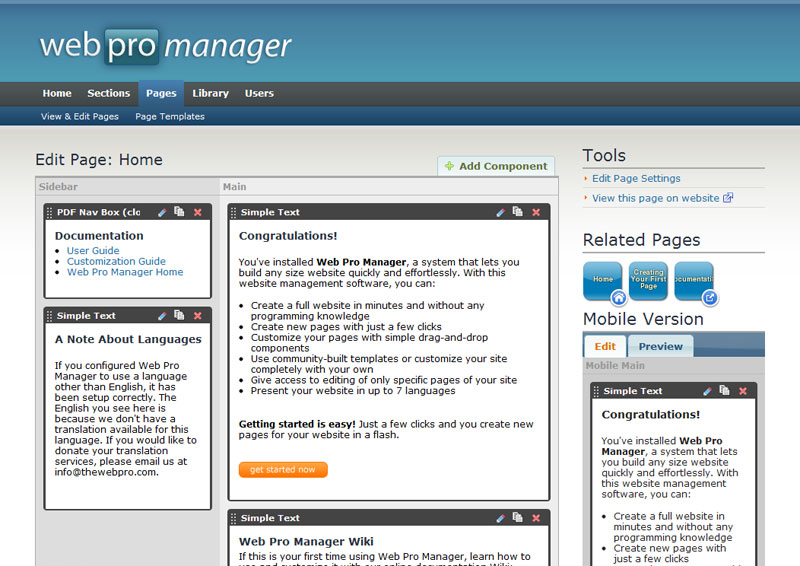
What are components?
Components are the building blocks that make up your pages in Web Pro Manager.
Components range in design and functionality depending on their intended purpose. You can easily construct many different types of Pages by filling them up with re-usable components.
All components available on your site are listed here, but because your site is fully scalable, more can be added in the future anytime.
How do I make my own?
All you need is to add two files to the 'comp' folder defining your new component. Before proceeding, you might want to browse the files currently in the 'comp' folder to get a feel of the components already installed with Web Pro Manager and how they work.
To create a new component, you must first make a PHP configuration file which defines what your component does. It can be named anything, but must end in a ".php" extension and reside in the 'comp' folder (e.g. "comp/mycomponent.php"). Without this file in place, the component will not install or run.
In your PHP configuration file, you will set a name and description of the component. You will also set a page-type limit which allows the component only to run on a certain type of page (e.g. Content, Homepage, or Search type only), and you will set an HTML template file for display of your component on the front-end website. To make sure your PHP configuration file is correctly formatted, you should copy the code from a default component that most resembles your new component.
With the name, description, page-type limit, and template set, you need to only add the fields that your component uses during editing and display. You do so with the "addField()" function.
Building Your Own Components: Technical Documentation
Component Fields
Use "addField()" to allow easy editing of your component by the user.
The addField function accepts 6 parameters:
{field ID} - determines how your field will be processed, choose ID from list below; field ID must be "text", "textarea", "linkid"(shows list of -Page or -Section), or "imgid" (shows list of images, add a dash and library name or default to "Content")
{title} - title to display in the back-end during editing
{caption} - caption to display in the back-end during editing
{default value} - default value in the back-end during editing
{field style} - CSS style in the back-end during editing
{template} - for lists (when field ID is 'linkid-Section') created during default processing, allows templating of individual list items using 2 tags: and
Here are 3 examples:
addField("text","Title","(max. 200 characters)","","width:750px;","","");
addField("linkid-Section","Build navigation from this Section","","","width:300px;","","basicnavitem.html");
addField("textarea","Content","","","width:750px;","","");
Default processing for Field IDs
text - displays text field
textarea - displays multi-line text field with rich-text editor
link-Page - sends back link to the page chosen
link-Section - displays a linked list of pages in the section (navigation) with optional parameters for display control
image-Header - displays the image
image-Content
image-Home
image-Button
image-Feature
image-Thumb
image-Background
image-Gallery
For more information on how to build your own components and for customizing Web Pro Manager, visit the Web Pro Manager Online Documentation Wiki.
For more information on how to build your own components and for customizing Web Pro Manager, visit the Web Pro Manager Online Documentation Wiki.
Web Pro Manager
How to Install a Component
Just upload the component files into your main "comp" folder.
Web Pro Manager will automatically detect and install it when you visit any component-related area.
Web Pro Manager will automatically detect and install it when you visit any component-related area.

